In parts one and two of this blog series, we went over how to set up Auth for both the frontend and the backend. However, one thing we left out was combining everything together. In my final post on OAuth 2.0 and OpenID Connect, we’ll go over how to combine the backend and the frontend together. I’ll also go over how to use and verify custom claims so that we can make admin-only routes.
Step 0: Initial Setup
If you haven’t read the previous parts of my series I would encourage you to do so however it’s not necessary for this tutorial. I’ve gone ahead and prepared a base setup for you to start from which uses all of the proper provider libraries to make things easier. To get started, clone my Github repo for this project and open the following folder: Auth -> OAuth2_OpenIDConnect -> Part3 -> StarterApp. Now for both the UI and the API, navigate into their respective folder, run npm install, and then npm run dev. You should now be able to access the UI and http://localhost:8080/ and see something like this:
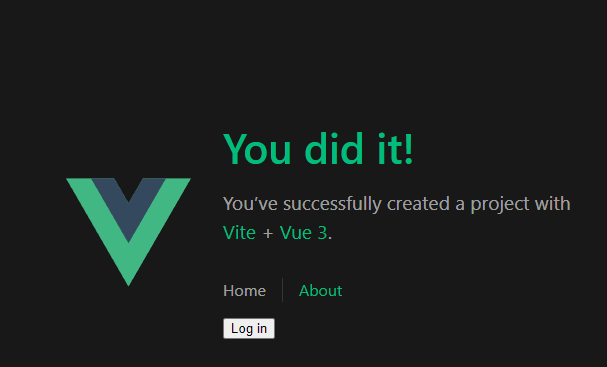
Additionally, if you hit http://localhost:3000/health from postman you should get back a Healthy response.
Step 1: Calling the API
Now that we’ve got everything set up let’s call the API! We’ll create two routes: The first one will call the health route and should always succeed, the second one will call our secure route and will only succeed when we have logged in. In the UI folder, start by installing axios: npm install axios.
Now, open the file src->components->TheWelcome.vue and modify the first WelcomeItem in the template like so:
<template>
  <WelcomeItem>
    <template #icon>
      <DocumentationIcon />
    </template>
    <template #heading>API Health Status</template>
    The backend API is: {{healthStatus}}
  </WelcomeItem>
Now at the top of the component add the following code to the script section:
<script setup>
import { ref, onMounted } from 'vue'
import config from '@/config'
import axios from 'axios'

import WelcomeItem from './WelcomeItem.vue'
import DocumentationIcon from './icons/IconDocumentation.vue'
import ToolingIcon from './icons/IconTooling.vue'
import EcosystemIcon from './icons/IconEcosystem.vue'
import CommunityIcon from './icons/IconCommunity.vue'
import SupportIcon from './icons/IconSupport.vue'

let healthStatus = ref('Pending...')

async function getApiHealth() {
  try {
    const response = await axios.get(`${config.apiBaseUrl}/health`)
    return response.data
  } catch {
    return 'Unhealthy'
  }
}

onMounted(async () => {
  healthStatus.value = await getApiHealth()
})
</script>
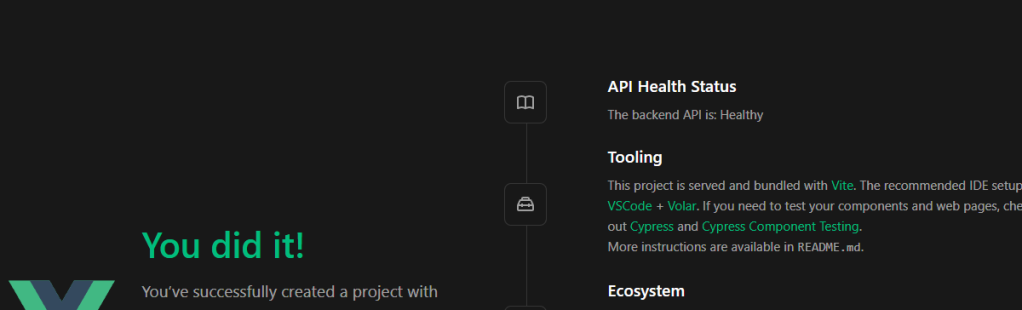
Breaking down the code, we have a variable called Health status that is displayed on the screen. When the DOM is mounted we call the API’s health route to get the status. If something goes wrong (like if the API is down) then it will set the variable to Unhealthy.
Finally one last thing before we test. Modify our config.js file and add the following property: apiBaseUrl: 'http://localhost:3000'If everything is working correctly your Vue app should now look like this:
We should get a health response regardless of if we are logged in or not. Now let’s add the secure route. First, edit the second welcome item and replace it with the following:
<WelcomeItem>
  <template #icon>
    <ToolingIcon />
  </template>
  <template #heading>Secure Route Status</template>
  Secure route message: {{secureRouteStatus}}
</WelcomeItem>
Then modify our script again:
let secureRouteStatus = ref('Pending...')

async function getSecureRouteStatus() {
  try {
    const response = await axios.get(`${config.apiBaseUrl}/secure-route`)
    return response.data
  } catch (e) {
    if (e.response && e.response.status > 300) {
      return e.response.data
    }

    return 'Unhealthy'
  }
}

onMounted(async () => {
  healthStatus.value = await getApiHealth()
  secureRouteStatus.value = await getSecureRouteStatus()
})
Now when we reload the page we should see an error regardless of if we have logged in or not:
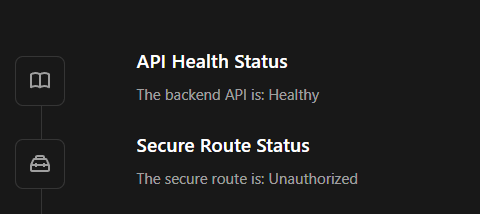
This is because even though we are logged in we aren’t using the access token yet which is what authorizes us against the API. To do that we need to slightly modify our getSecureRouteStatus() function. First, at the top of the scrip add the import:
import { useAuth0 } from '@auth0/auth0-vue'
const { getAccessTokenSilently } = useAuth0()
Then modify our function:
async function getSecureRouteStatus() {
  let accessToken

  try {
    accessToken = await getAccessTokenSilently()
  } catch {}

  try {
    const response = await axios.get(`${config.apiBaseUrl}/secure-route`, {
      headers: {
        'Authorization': `Bearer ${accessToken}`
      }
    })
    return response.data
  } catch (e) {
    if (e.response && e.response.status > 300) {
      return e.response.data
    }

    return 'Unhealthy'
  }
}
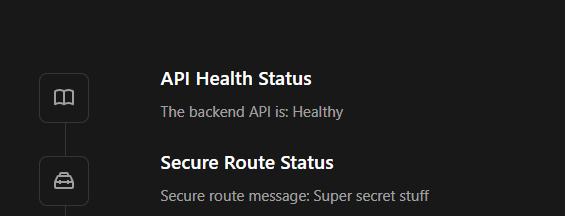
We first try to get the access token and then we add is as an authorization header to our request. Now modify our config.js again adding the audience property: audience: <your API audience here>Now if we reload the page:
Step 2: Add Custom Claims to Token
Often times we will include additional information on a user’s id and access token which can securely let our apps know things about the user. For example, maybe we want to restrict access to a part of the application based on a user’s role or maybe we want to check if a user is active or not. OpenID Connect specifies some default claims but we can add as many other claims as we want. How you add claims will differ from provider to provider but the general idea is that when the provider is authenticating the user they will inject additional claims into the token that is given back. To do this in Auth0 we will use a feature called Actions.
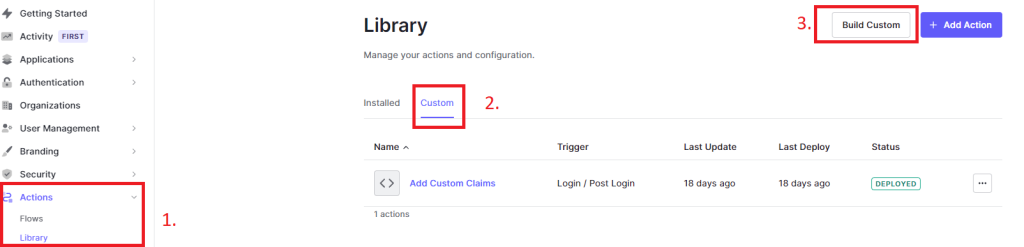
To start navigate to Auth0 and go to Actions -> Library -> Custom and click Add Action:
Give it a name, select Login/Post Login as the trigger, select Node 16, and click Create:

Add the following code to the rule and click deploy:
/**
 * @param {Event} event - Details about the user and the context in which they are logging in.
 * @param {PostLoginAPI} api - Interface whose methods can be used to change the behavior of the login.
 */
exports.onExecutePostLogin = async (event, api) => {
  const namespace = 'https://<custom-namespace-here>';
  if (event.authorization) {
    api.idToken.setCustomClaim(`${namespace}/roles`, event.authorization.roles);

    api.accessToken.setCustomClaim(`${namespace}/roles`, event.authorization.roles);
  }
}
Make sure to replace <custom-namespace-here> with your own. While not required it is common practice to make the namespace the URL for your site. So if you were writing the rule for google the namespace would be: https://google.com
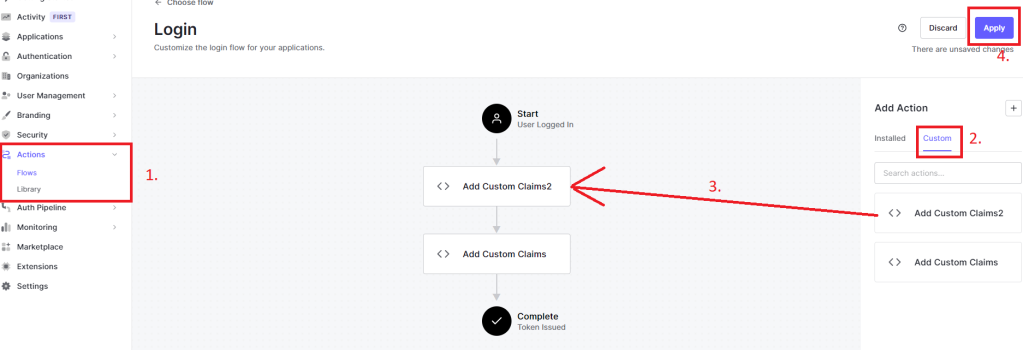
The code itself is pretty straightforward. It simply adds a new custom claim called roles with a value that comes from Auth0 itself via the event.authorization object. Once you have deployed the rule go to Actions -> Flows -> Login and on the far right click the custom tab and drag the new action in between start and complete. Finally, click Apply.
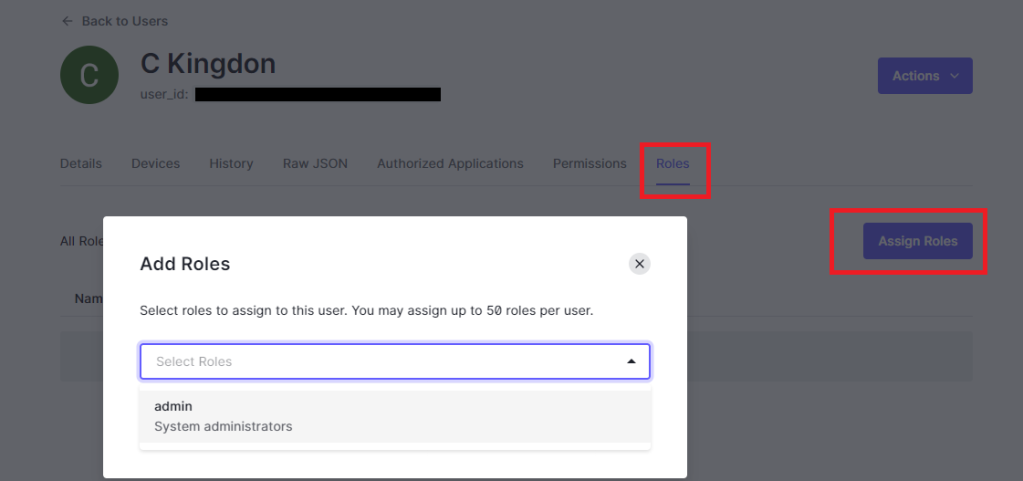
Before we can test out our new action we need to give our user a role so that it will show up. To do that in Auth0 go to User Management->Roles and click Create Role. Give it any name and description and click create. Now, navigate to User Management->Users and click on the user you want to give the role to. Click on the roles tab and click Assign Roles then select the role you want to give your user and click Assign:
Now that we have a user with our role let’s make an API route that is protected to only allow that role.
Step 3: Admin Only Route
We’ll start by writing a new middleware called authorization middleware. Unlike our authentication middleware which is concerned with proving WHO you are the authorization middleware is concerned with WHAT you can do once we know who you are. Create a new file in the src directory called authorizationMiddleware.js and add the following code:
import config from './config.js'

export function adminOnly(req, res, next) {
  if (!req.user) {
    return res.sendStatus(403)
  }

  const userRoles = req.user[`${config.auth0.customClaimNamespace}/roles`]

  if (!userRoles || !userRoles.map(u => u.toLowerCase()).includes('admin')) {
    return res.sendStatus(403)
  }

  next()
}
The middleware will start by ensuring that we have a user and then checks the claims of that user to see if they have the admin role. Now we’ll create a route that uses the middleware. Edit your routes.js and add the following route:
import { adminOnly } from './authorizationMiddleware.js'

router.get('/admin-only', authMiddleware, adminOnly, (req, res) => {
  res.send('Admin only stuff!')
})
We first call the auth middleware to get the user, then we call the adminOnly authorization middleware to ensure the user is allowed to access the route, finally we call the actual route.
Now let’s update the UI to use it!
Step 4: Calling the Admin Only Route
Open up TheWelcome.vue again. Modify the Ecosystem WelcomeItem as follows:
<WelcomeItem>
  <template #icon>
    <EcosystemIcon />
  </template>
  <template #heading>Admin Only Route</template>
  Admin only message: {{adminOnlyStatus}}
</WelcomeItem>
And modify our script again:
let adminOnlyStatus = ref('Pending...')

async function getAdminOnlyStatus() {
  let accessToken

  try {
    accessToken = await getAccessTokenSilently()
  } catch {}

  try {
    const response = await axios.get(`${config.apiBaseUrl}/admin-only`, {
      headers: {
        'Authorization': `Bearer ${accessToken}`
      }
    })
    return response.data
  } catch (e) {
    if (e.response && e.response.status > 300) {
      return e.response.data
    }

    return 'Unhealthy'
  }
}

onMounted(async () => {
  healthStatus.value = await getApiHealth()
  secureRouteStatus.value = await getSecureRouteStatus()
  adminOnlyStatus.value = await getAdminOnlyStatus()
})
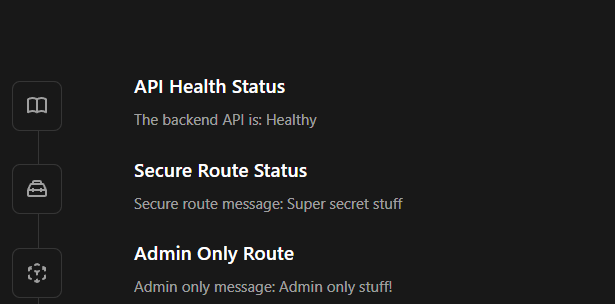
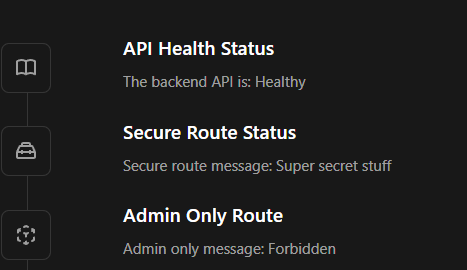
If we now login to our site with the user we made an admin we should get the following:
However, if we log in as a user who is NOT an admin we should get a forbidden result:
Step 5: Using Claims in the UI
The final thing I’ll go over is how to use custom claims in the UI. It’s great that we can secure our API with claims but it would be nice if our application didn’t even try to call the API if it knows we aren’t an admin. This leads to a better user experience. To do this we’ll modify our script to first wait to call the API until we are logged in and then won’t call the admin route if we are not an admin.
At the top of our file we will import watch instead of onMounted and add two additional properties from useAuth0():
import { ref, watch } from 'vue'
const { getAccessTokenSilently, isAuthenticated, user } = useAuth0()
Next we’ll remove the onMounted() function and replace it with two new functions: watch() and getStatuses():
async function getStatuses() {
  healthStatus.value = await getApiHealth()

  if (isAuthenticated.value) {
    secureRouteStatus.value = await getSecureRouteStatus()

    const roles = user.value[`${config.customNamespace}/roles`]

    if(roles && roles.map(r => r.toLowerCase()).includes('admin')) {
      adminOnlyStatus.value = await getAdminOnlyStatus()
    } else {
      adminOnlyStatus.value = 'Not an admin!'
    }
  } else {
    secureRouteStatus.value = 'Not logged in.'
    adminOnlyStatus.value = 'Not logged in.'
  }
}

watch(() => isAuthenticated, async () => {
  await getStatuses()
}, {
  immediate: true,
  deep: true
})
The watch method is called whenever the isAuthenticated variable changes. We also call it at the start with the immediate flag. This then in turns calls our getStatuses function which will call the API as necessary. It starts by checking if we are authenticated and if not doesn’t call any routes except health. Then it checks the user’s roles before calling the admin only route. The result is that when the user is not logged in or not an admin it will not make extra calls to the API:

Note: If you are confused as to how the user variable has the roles claim it is added internally by the Auth0 SDK library. The claims on the user variable come from the ID Token that is gotten during code exchange.
Final Thoughts
And there you have it! A fully functional application with several secured routes. We saw how to hook up the UI and the API together and we also looked at how to secure routes based on token claims as well as normal authentication. Finally, we also looked at how to prevent the UI from making unnecessary calls which can lead to a bad user experience when they fail. Hopefully, this series has been helpful to you. I know that at times authentication and authorization can be very confusing. I would encourage everyone to really do a deep dive into this stuff and get a good understanding of how everything works under the hood. As always if you have any questions about anything in this post or any of my previous posts on auth let me know down in the comments. Until next time, happy coding!
