I’ve spent a ton of time over the past several months building out infrastructure via bicep. Today’s post will be a bit different than normal. Instead of a tutorial on how to do various things I’ll be going over some of the more recent challenges I’ve encountered while working with bicep as well as how I worked around them.
Challenge 1: Log Diagnostic Settings
To fully utilize the logging and metrics gathering capabilities of Azure, there is a special setting you have to enable on various resources called Log Diagnostic Settings. Under the hood, it’s a resource that connects a resource to a log analytics workspace. You can see it in portal as an individual resource or you can see all resources that have a diagnostic setting enabled from the resource group itself:
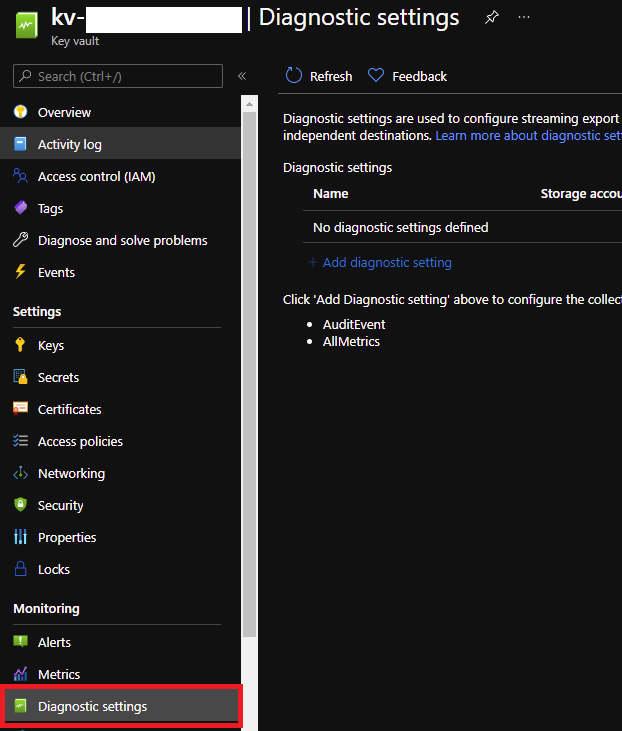
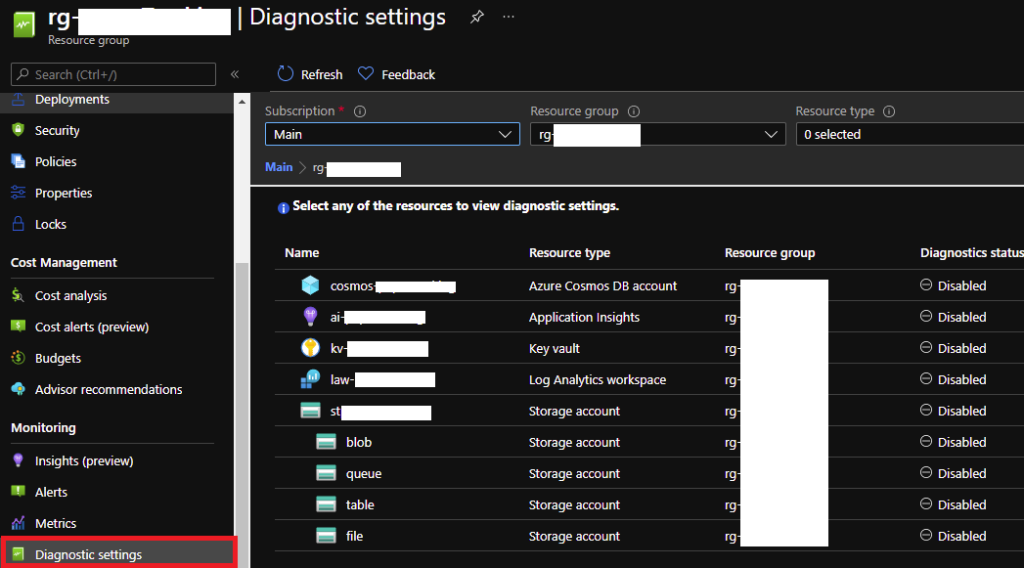
Notice in the second image all of the various resources that can have a diagnostic setting. The problem is unlike most resources if you were to manually add the diagnostic setting in the portal and then export to a template to try and see what it is you would find that diagnostic settings are oddly missing. Trying to find how to do this in bicep is very difficult at the moment as there is almost no documentation on it.
So how do we do it in bicep? Well, let’s add a diagnostic setting to a keyvault. First, we have the actual bicep code for the keyvault itself:
param projectName string
param accessPolicies array

var name = 'kv-${projectName}'

resource keyvault 'Microsoft.KeyVault/vaults@2019-09-01' = {
  name: name
  location: resourceGroup().location
  tags: resourceGroup().tags
  properties: {
    tenantId: subscription().tenantId
    sku: {
      family: 'A'
      name: 'standard'
    }
    enabledForDeployment: false
    enabledForDiskEncryption: false
    enabledForTemplateDeployment: false
    enableSoftDelete: true
    softDeleteRetentionInDays: 30
    enablePurgeProtection: true
    accessPolicies: accessPolicies
  }
}
Now to actually create a diagnostic setting we have to use a specific api version of the microsoft.insights/diagnosticSettings below the keyvault like so:
resource diagnosticSetting 'microsoft.insights/diagnosticSettings@2017-05-01-preview' = {
  scope: keyvault
  name: name
  properties: {
    workspaceId: workspaceId
    logs: [
      {
        category: 'AuditEvent'
        enabled: true
        retentionPolicy: {
          days: 90
          enabled: true
        }
      }
    ]
    metrics: [
      {
        category: 'AllMetrics'
        enabled: true
      }
    ]
  }
}
There are several key things to take away from this code snippet:
- API Version: The API version must be 2017-05-01-preview otherwise it won’t deploy
- Scope: This is the magic piece that connects this resource to the thing you want. You just set the scope to the variable name of the resource you created above. In my case, it’s just “keyvault”.
- Name: The name of the diagnostic needs to match the name of the resource you are adding it to exactly.
- workspaceId: This is your log analytics workspace id.
- logs/metrics: This is where we specify what we want to log. Every resource has different things you can log. The easiest way to find what can be logged is to go to the resource in portal, click Diagnostic settings, and then click add setting. From there you can see the list of valid logs/metrics you can use.
Challenge 2: App Service Nested Configs
If you have ever built out a web app with bicep you are probably familiar with some of the child resources on Microsoft.web/sites that allow you to separate things like site config into a separate resource. However, there is another way to use them besides declaring a separate resource underneath everything else. Along with this, there are a few settings that seem to be missing from any documentation and aren’t exported to the template from portal.
To begin we’ll create the basic structure for a web app:
param projectName string
param serverFarmId string
param corsAllowedOrigins array = []

var appName = 'app-${projectName}'

resource webApp 'Microsoft.Web/sites@2020-12-01' = {
  name: appName
  location: resourceGroup().location
  tags: resourceGroup().tags
  kind: 'app,linux'
  properties: {
    serverFarmId: serverFarmId
    httpsOnly: true
    siteConfig: {
      http20Enabled: true
      ftpsState: 'FtpsOnly'
      netFrameworkVersion: 'v5.0'
      alwaysOn: false
      linuxFxVersion: 'DOTNETCORE|5.0'
      cors: {
        allowedOrigins: corsAllowedOrigins
      }
      appSettings: []
    }
  }
}
Next there are some logging settings we want to enable. The actual settings are scattered around portal a bit in the app serivce but with bicep we can configure them all in one spot. To do this we will create what is called nested resource:
resource webApp 'Microsoft.Web/sites@2020-12-01' = {
  name: appName
  location: resourceGroup().location
  tags: resourceGroup().tags
  kind: 'app,linux'
  properties: {
    serverFarmId: serverFarmId
    httpsOnly: true
    siteConfig: {
      http20Enabled: true
      ftpsState: 'FtpsOnly'
      netFrameworkVersion: 'v5.0'
      alwaysOn: false
      linuxFxVersion: 'DOTNETCORE|5.0'
      cors: {
        allowedOrigins: corsAllowedOrigins
      }
      appSettings: []
    }
  }

  resource logging 'config@2020-12-01' = {
    name: 'logs'
    properties: {
      applicationLogs: {
        fileSystem: {
          level: 'Error'
        }
      }
      httpLogs: {
        fileSystem: {
          retentionInMb: 50
          retentionInDays: 7
          enabled: true
        }
      }
      detailedErrorMessages: {
        enabled: true
      }
    }
  }
}
When creating nested resources you only need to specify the part of the resource type that comes last. So we don’t have to have it be Microsoft.Web/sites/config we just say config. The same goes for the name. When it’s created at build time the name will get expanded to include the parent name so we only need to specify “logs” here. There are tons of nested resources you can create. You can find a list of some of them here under the sites/ tab.
Note: The name of the resource is important. As you’ll see in a second there are many different config settings you can specify with the config resource type and they all depend on a specific name.
Along with logs, another hard-to-find config is slot settings. Sometimes you want to make certain appsettings slot specific. If you aren’t familiar with appService slots you can read more about them here. To specify an appsetting as slot specific we add another nested resource also of type config below our first one like this:
resource slotSettingNames 'config@2020-12-01' = {
    name: 'slotConfigNames'
    properties: {
      appSettingNames: [
        'SomeSlotSpecificSetting'
      ]
    }
  }
Notice how the name is important here as noted above.
Challenge 3: Role Assignments
Unlike the previous two challenges, this one has some documentation around how to do it, although it can still be tricky. In Azure, there is a feature called Managed System Identities (MSI). This feature allows an application to access other resources in azure such as storage accounts or databases without the need of storing a connection string. This means your application is more secure and in some cases much simpler to handle. I won’t go too in-depth on how to set it up here but basically, you need your app service to get an identity (either system assigned or user assigned), and then when we create the resource we want to access we give that identity the appropriate role.
For this example, I’ll be setting up MSI on a storage account. As before we’ll start with the basic code to create a storage account:
param projectName string
param location object

resource storageAccount 'Microsoft.Storage/storageAccounts@2021-01-01' = {
  name: 'st${toLower(projectName)}${location.short}'
  location: location.long
  tags: resourceGroup().tags
  kind: 'StorageV2'
  sku:{
    name: 'Standard_ZRS'
    tier: 'Standard'
  }
  properties:{
    accessTier: 'Hot'
    supportsHttpsTrafficOnly: true
    minimumTlsVersion: 'TLS1_2'
  }

  resource blobServices 'blobServices@2021-02-01' = {
    name: 'default'
    properties: {}
  }
}

output name string = storageAccount.name

// This is used to store an appsetting if we switch to MSI we can remove this
output key string = listKeys(storageAccount.id, '2021-01-01').keys[0].value
So here we have a pretty standard storage account. You’ll notice a nested resource in there for blobServices. All sorts of resources have nested resources as mentioned in challenge 2 so be sure to take a look at them. Besides that, we also have an output at the bottom which emits the storage account key so that we can build a connection string in our app service later. MSI allows us to remove that.
All we have to do is in the appservice bicep itself add: identity: { type: 'SystemAssigned' } somewhere under the root app resource. Then at the end of the file output the principal id: output msiPrincipalId string = appService.identity.principalId
Now in our storage account bicep, we can use it like this:
param projectName string
param location object
param msiPrincipalId string

resource storageAccount 'Microsoft.Storage/storageAccounts@2021-01-01' = {
  name: 'st${toLower(projectName)}${location.short}'
  location: location.long
  tags: resourceGroup().tags
  kind: 'StorageV2'
  sku:{
    name: 'Standard_ZRS'
    tier: 'Standard'
  }
  properties:{
    accessTier: 'Hot'
    supportsHttpsTrafficOnly: true
    minimumTlsVersion: 'TLS1_2'
  }

  resource blobServices 'blobServices@2021-02-01' = {
    name: 'default'
    properties: {}
  }
}


var storageBlobDataContributorRole = '/subscriptions/${subscription().subscriptionId}/providers/Microsoft.Authorization/roleDefinitions/ba92f5b4-2d11-453d-a403-e96b0029c9fe'

resource roleAssignStorage 'Microsoft.Authorization/roleAssignments@2020-04-01-preview' = {
  name: guid(msiPrincipalId, storageBlobDataContributorRole, resourceGroup().name)
  scope: storageAccount
  dependsOn: [
    storageAccount
  ]
  properties: {
    roleDefinitionId: storageBlobDataContributorRole
    principalId: msiPrincipalId
  }
}

output name string = storageAccount.name
roleAssignStorage is what is called an extension resource. You can learn more about extension resources and how to use them here.
All we are doing here is giving the assignment a name which must be a unique guid. (In my case I’m using the guid function with some other info to make it unique) Then, we scope it to the storage account. Finally, we specify the role definition we want to assign to our application. With this done we are good to go! Note: You may need to update your code to use MSI rather than a connection string but it’s a fairly minor code change.
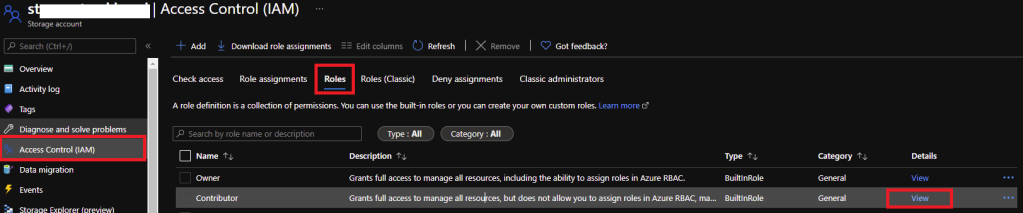
If you are looking at this, you may be wondering where on earth I got the magical roleDefinitionId from? That’s a good question and one I had to search around for to find the answer. It turns out you can find the list of definition ids by going to portal. Start by pulling up the resource you want to assign a role for. (The storage account in my case). Now go to Access Control, Roles tab, find the role you want to get the id for, and click view:
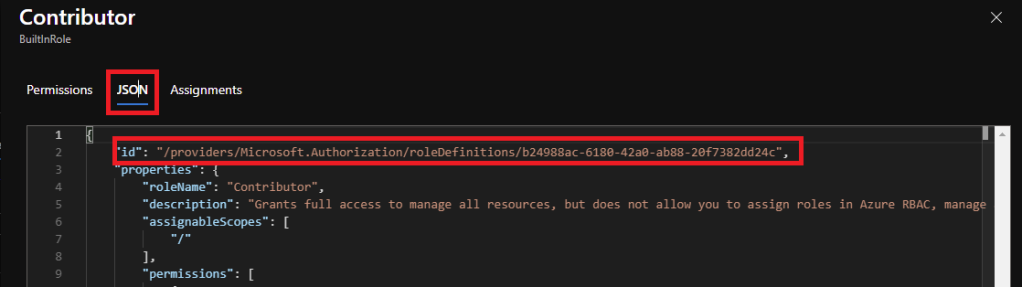
Finally, click JSON and then the id can be found at the top:
Every resource has various roles that be assigned to them so you may have to look around a bit to find what you want specifically. If anyone out there knows of a better way to find these ids please let me know in the comments!
Final Thoughts
So today we looked at a few of the challenges I’ve run into while using bicep over the past few months. I hope that this is helpful and you won’t have to dig around as long as I did to figure some of these things out. Bicep is a great tool and it’s still relatively early days so I’m excited to see what they add in the future. That being said I wish that the documentation around some of these things was better. Even in cases where there is documentation, it can be incredibly difficult to find out how to use it properly.
That’s all I have for today! I think I may do some more of these tips & tricks posts as I learn more so be sure to check back. As always let me know if you have any questions or if there’s anything I can improve!
