Welcome back! In the last two posts we went over setting up azure functions, running them locally, and then testing them. This week we are going to talk about the steps to get our function app production ready. We will go over how to automatically deploy the necessary infrastructure, how to run unit tests during the build, and finally how to deploy our function app to production.
Step 1: Azure Devops
The first thing we need to do is make sure everything is set up in Azure Devops. Navigate to dev.azure.com. If you don’t already have an organization go ahead and create one now. You will be asked to give it a name and region. In my case I just chose cdkingdon and then Central US.

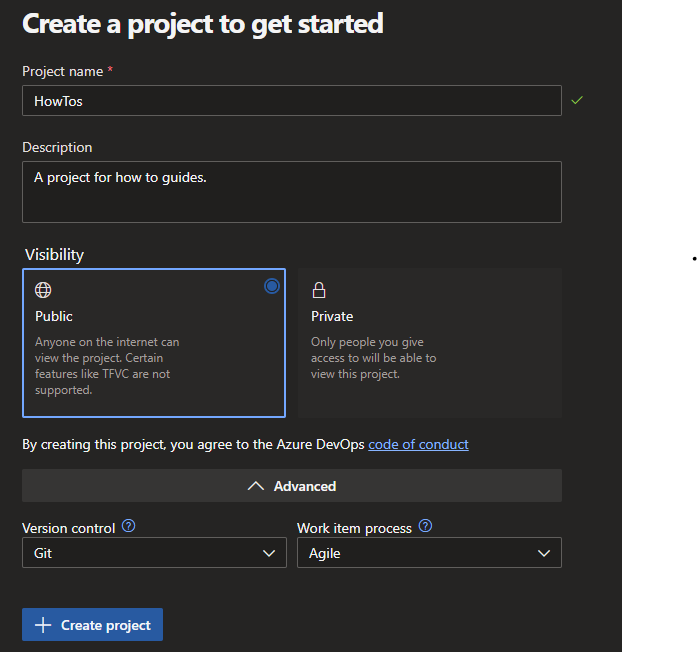
Now we’ll create our project. If you already have other projects you can click the new project button in the top right of the screen, otherwise, just fill out the name, description, and whether or not you want the project to be private.
Once that’s done you have a new project on your dashboard. Go and click on it and we’ll take a look around. On the left you’ll see a bunch of different tabs. Today we only really care about the pipelines tab. So let’s go ahead and set up our very first pipeline.
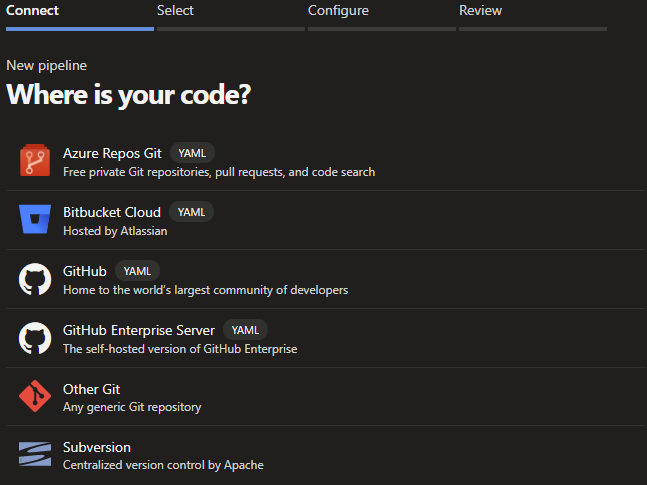
To start, go ahead and click on the pipelines tab and then click Create Pipeline (or New Pipeline in the top right if you already have existing pipelines). You will then be prompted to select where your code is stored. In my case my code lives in GitHub so i’ll select that one.
It will then prompt you to pick the repository to pull your code from. Select your repository to move on to the next step.
(I should pause here really quick and just mention that if your code isn’t already in a git repo you should go ahead and do that. I won’t go into how to do that here but if it’s something that you would like me to write a guide on please let me know in the comments!)
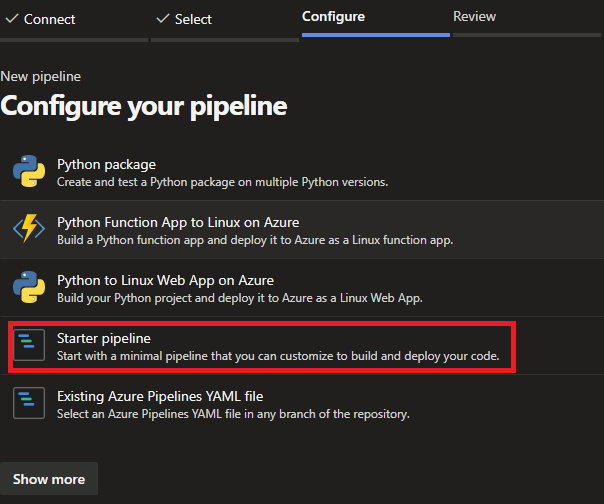
Once you have selected the repo it will prompt you with several templates to choose from. Since we are going to build our own template click Start pipeline. If you ever are lost on where to start with a pipeline some of these templates can be really valuable.
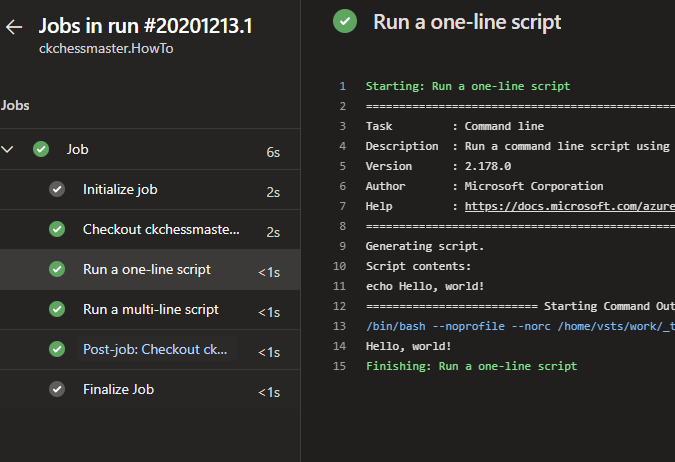
We will now be prompted to see what our pipeline will look like. I’ll go into more details on the sections later but for now this is a good start so go ahead and click save and run in the top right. (You may be prompted to commit the file, go ahead and do this now). This will kick off the pipeline and if everything works fine you should see the pipeline running. If you click on it you can get more details about this particular run.
Now that we have our first pipeline set up lets go ahead and build on it to deploy our infrastructure in the next section!
Step 2: ARM
Before we can deploy our function app we first need to make sure our infrastructure is in place. While we could do this by hand (as we did in Part 1) this isn’t a very good idea for production. Instead we will automate the process for deploying our infrastructure using something called Azure Resource Manager Templates (ARM Templates).
To begin let’s create a new directory in our root directory next to src called infra. Inside we will create two new files: pythonFunctionsDemoApp.json and pythonFunctionsDemoApp.parameters.json. Our file structure should now look something like this:
infra/
 ├── pythonFunctionsDemoApp.json
 └── pythonFunctionsDemoApp.parameters.json
src/
 └── ...
azure-pipelines.yml
ARM Templates allow you to define all of the settings that you will need to deploy a resource in Azure. The quickest way to start is to copy infrastructure that you already have. To do that go to the Azure Portal and navigate to the resource group you have created before. (If you don’t have one yet you can either skip this part or go back to Part 1 for how to set it up).
From there scroll down on the right hand menu and click on “Export template”.
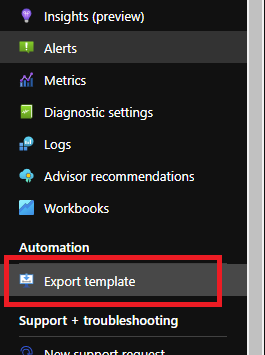
This might take a minute but once it completes you should see a bunch of json in the right hand window. Copy everything there and paste it into the pythonFunctionsDemoApp.json file. Now technically we could deploy this right now and everything should work but we should do some cleanup.
To start lets change all locations to use the resource group’s location. This will help us going forward in case we need to change the location in the future. To do this change any lines that look like this: "location": "eatus" or this: "location": "East US" to "location":"[resourceGroup().location]"
Under the type “Microsoft.Web/sites” find the property properties->siteConfig and add the following section:
{
  "appSettings": [
	{
	  "name": "AzureWebJobsStorage",
	  "value": "[concat('DefaultEndpointsProtocol=https;AccountName=', parameters('storageAccount'), ';AccountKey=', listKeys(resourceId('Microsoft.Storage/storageAccounts', parameters('storageAccount')),'2019-06-01').keys[0].value)]"
	},
	{
	  "name": "FUNCTIONS_WORKER_RUNTIME",
	  "value": "python"
	},
	{
	  "name": "FUNCTIONS_EXTENSION_VERSION",
	  "value": "~3"
	}
  ]
}
Note here we are setting some app settings that our function app will need. In particular take a look at how we are getting the storage account key programmatically. ARM Templates allow you to do a lot of really cool things like this to prevent having to hardcode secrets and other things. I’ll have a link down below to more documentation on all the things you can do with ARM templates.
Finally you can remove the two blocks with type “Microsoft.Web/sites/functions” and the “Microsoft.Storage/storageAccounts/fileServices” block. The function blocks will get created by our deployment of the function app and the file services are just not needed for now. This completes everything we need to do for the main template file. The file is rather long so I won’t post it here but you can find the full code here.
Next let’s move on to the parameters file. This file is used to specify the parameters at the top of our template file. We can use this to reuse our template in the future or even dynamically change parameters in the pipeline. For every parameter at the top of our template file we will have an entry in our parameters file. It should look something like this:
{
  "$schema": "https://schema.management.azure.com/schemas/2019-04-01/deploymentParameters.json#",
  "contentVersion": "1.0.0.0",
  "parameters": {
    "sites_chrisDemoFunctionApp_name": {
      "value": "chrisDemoFunctionApp"
    },
    "serverfarms_EastUSLinuxDynamicPlan_name": {
        "value": "EastUSLinuxDynamicPlan"
    },
    "components_chrisDemoFunctionApp_name": {
        "value": "chrisDemoFunctionApp"
    },
    "storageAccounts_chrisdemostorage_name": {
        "value": "chrisdemostorage"
    }
  }
}
With this done we have everything we need for our infrastructure. There’s a lot here so I encourage you to go through and look at the ARM template. Pretty much anything you can change in the Azure portal you can also specify via an ARM template. ARM templates are extremely powerful and are a great way to create a robust production environment.
Step 3: Infra Pipeline
With our ARM templates in place we are ready to start working on our pipelines! We’ll start with our infra pipeline.
Start by creating a new file inside of the infra folder called “infra-pipeline.yml”. With that file created we will start by adding a trigger. This will tell our pipeline when to automatically run. Since we only want this pipeline to run when something in the infra folder changes we can add the “path” parameter like so:
trigger:
  branches:
    include:
    - master
  paths:
    include:
    - infra/*
Next we’ll add some variables that we will use throughout the pipeline:
variables:
  resourceGroup: chrisDemoResourceGroup
  location: eastus
  subscription: <your subscription id>
  vmImageName: 'ubuntu-latest'
Note: To get your subscription id, go to the Azure portal and navigate to the resource group you created. You can find the subscription id on the overview page:

Next we’ll specify the agent pool to use:
pool:
  vmImage: $(vmImageName)
Now we get into the actual pipeline steps:
stages:
- stage: Deploy
  jobs:
  - job: DeployInfra
    displayName: Deploy Release Manager Infrastructure
    steps:

    - task: AzureCLI@2
      displayName: Create Resource Group
      inputs:
        azureSubscription: ARM
        scriptType: pscore
        scriptLocation: inlineScript
        inlineScript: az group create --location $(location) --name $(resourceGroup) --subscription $(subscription)

    - task: AzureResourceGroupDeployment@2
      displayName: Create Release Management Infrastructure
      inputs:
        azureSubscription: ARM
        resourceGroupName: $(resourceGroup)
        action: 'Create Or Update Resource Group'
        location: $(location)
        templateLocation: 'Linked artifact'
        deploymentMode: Incremental
        csmFile: '$(Build.SourcesDirectory)/infra/pythonFunctionsDemoApp.json'
        csmParametersFile: '$(Build.SourcesDirectory)/infra/pythonFunctionsDemoApp.parameters.json'
Our first step is to create the resource group if it doesn’t exist yet. As of the time of writing this we cannot deploy a resource group via an ARM template deployment task so we create the resource group via a powershell script. Next we deploy the actual ARM template.
To actually run our new pipeline navigate back to dev.azure.com and go to pipelines. Create a new pipeline as before but instead of selecting the starter pipeline select “Existing Azure Pipelines YAML file”.

It’ll ask for a path to the file. Select the infra-pipeline.yml file you just made. After you select the yaml file click run.
Note: If you don’t see it here make sure that you push your latest changes to the git repo.
When the pipelines run it should fail with the following error:

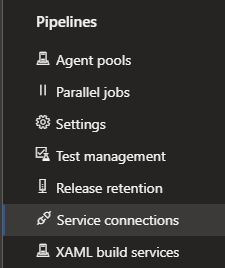
This is fine, we just have to make a change to our project settings. Navigate to project settings in the bottom left. From there go to Service connections and click “New service connection” in the top right. Now select “Azure Resource Manager”, click next, and then click “Service principal (automatic)”.


The next section will have you fill out a bunch of information such as the subscription, resource group, and name:
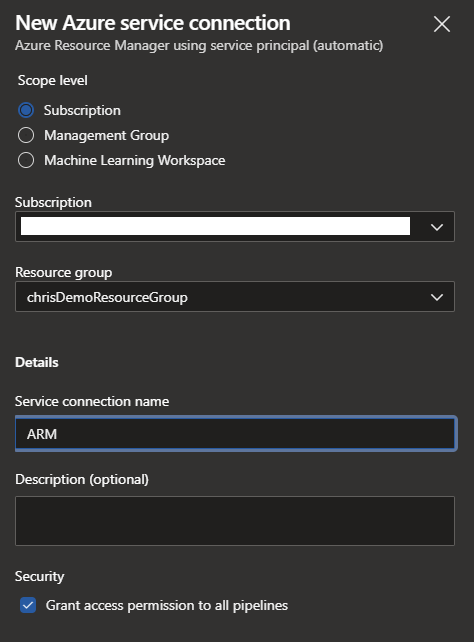
Note: The service connection name should match the azureSubscription property in your infra-pipeline.yml file.
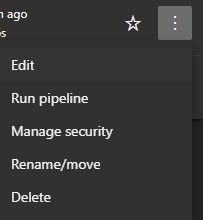
You should be able to go ahead and run the pipeline. The pipeline may not have the right name (something like HowTo (1)). You can rename the pipeline via the menu to the right of pipeline:
Assuming everything was done correctly the pipeline should run successfully. Now to test that it’s 100% working, navigate to the Azure portal, delete your resource group (assuming that this is the only thing in it), and re-run the pipeline and verify that all of the resources were recreated.
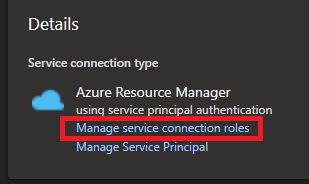
Note: If you get the following error: ##[error]Script failed with error: The subscription of '<subscriptionIdHere>' doesn't exist in cloud 'AzureCloud'. You will need to add a service connection role. To do this navigate to “Project Settings”->”Service connections”->YourNewServiceConnection and then click on Manage service connection roles.
From here go to role assignments and click Add->Add Role Assignment.

From the role dropdown select “Contributor”. Select “User, Group, or service principal” from the “assign access to” dropdown. Finally select the organization/project name that we need to give access. In my case it was cdkingdon-HowTos-mysbuscriptionid. Now click save and re-run the pipeline.
Step 4: Function Deploy Pipeline
Now that we have our infrastructure in place lets work on the final step of actually deploying and testing our app. Go ahead and open up the azure-pipelines.yml file that was created from the starter pipeline earlier. Delete everything and add the following to the file:
trigger:
  batch: true
  branches:
    include:
    - master
  paths:
    include:
    - PythonFunctionApp/src/*

variables:
  subscription: ARM
  functionAppName: uan-fa-release-manager
  vmImageName: 'ubuntu-latest'
  workingDirectory: '$(System.DefaultWorkingDirectory)/PythonFunctionApp/src'

pool:
  vmImage: $(vmImageName)
Now let’s create our first stage: The testing stage. This stage will run our unit tests and output the results to the build. This will allow us to prevent the app from getting deployed if one of our tests fails.
stages:
- stage: Test
  displayName: Test
  jobs:
  - job: UnitTest
    displayName: UnitTest
    steps:
    - task: UsePythonVersion@0
      displayName: 'Use Python 3.8'
      inputs:
        versionSpec: 3.8

    - script: pip install -r requirements.txt
      displayName: 'Install Dependencies'
      workingDirectory: $(workingDirectory)

    - script: pytest $(workingDirectory)/tests --doctest-modules --junitxml=junit/test-results.xml
      displayName: Run Tests
      workingDirectory: $(workingDirectory)

    - task: PublishTestResults@2
      displayName: Publish Test Results
      condition: succeededOrFailed()
      inputs:
        testResultsFiles: '$(workingDirectory)/**/test-*.xml'
        testRunTitle: 'Publish test results for Python $(python.version)'
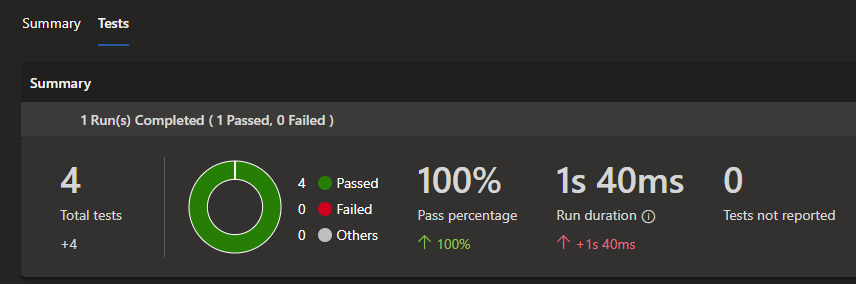
Breaking this down we start by setting the python version and then we install the requirements. Next we run our unit tests just like we would locally. The one difference is that we specify to use junitxml so that we can see the results in the pipeline. Finally we publish the test results. If we run our pipeline now we should see that the tests pass. If you want more information on the tests you can go to a particular build and click on the Tests tab.
Now for the moment we’ve been waiting for. Let’s get this app deployed to production!
- stage: Build
  displayName: Build
  dependsOn: Test
  condition: succeeded('Test')
  jobs:
  - job: Build
    displayName: Build
    steps:
    - task: UsePythonVersion@0
      displayName: 'Use Python 3.8'
      inputs:
        versionSpec: 3.8

    - bash: |
        if [ -f extensions.csproj ]
        then
          dotnet build extensions.csproj -output
        fi
      workingDirectory: $(workingDirectory)
      displayName: Build Extensions

    - bash: |
        pip install --upgrade pip
        pip install --target=".python_packages/lib/site-packages" -r requirements.txt
      displayName: Install Dependencies
      workingDirectory: $(workingDirectory)

    - task: ArchiveFiles@2
      displayName: 'Archive files'
      inputs:
        rootFolderOrFile: '$(workingDirectory)'
        includeRootFolder: false
        archiveType: zip
        archiveFile: $(Build.ArtifactStagingDirectory)/$(functionAppName)$(Build.BuildId).zip
        replaceExistingArchive: true

    - publish: $(Build.ArtifactStagingDirectory)/$(functionAppName)$(Build.BuildId).zip
      displayName: 'Upload Package'
      artifact: func
First we’ll create a new stage called build. It starts the same as the unit test build by setting the Python version and installing dependencies. Next it archives the files into a .zip folder and uploads the package as an artifact. Now we’ll create one last stage called deploy:
- stage: Deploy
  displayName: Deploy
  dependsOn: Build
  condition: succeeded('Build')
  jobs:
  - deployment: Deploy
    displayName: Deploy
    environment: 'production'
    strategy:
      runOnce:
        deploy:
          steps:

          - task: AzureFunctionApp@1
            displayName: 'Azure functions app deploy'
            inputs:
              azureSubscription: '$(subscription)'
              appType: functionAppLinux
              appName: $(functionAppName)
              package: '$(Pipeline.Workspace)/func/$(functionAppName)$(Build.BuildId).zip'
This stage takes the artifact that we created in the build stage and then pushes it to production. Finally run our pipeline one last time and assuming everything passes you should be able to hit your function app in production!
Final Thoughts
DevOps can often be one of the more complicated parts of getting stuff production ready but as we saw it’s actually not that bad once you’ve seen some examples. There’s a lot of edge cases with this stuff so if I missed anything be sure to let me know in the comments and I’ll try and address it. Thanks for reading, see you next time!
